
Gluten-free living doesn’t mean you have to give up the joy of fresh, homemade bread. With this recipe, you can enjoy a delicious, fluffy loaf that’s perfect for sandwiches, toast, or simply slathering with butter. This recipe is designed specifically for bread machines, making it incredibly easy to whip up a gluten-free loaf without the hassle of traditional baking methods.
What makes this homemade gluten-free bread special is its simplicity and versatility. Whether you’re new to gluten-free baking or a seasoned pro, this recipe uses accessible ingredients and straightforward steps to create a loaf that’s soft, moist, and full of flavor. Plus, the bread machine does most of the work for you, ensuring consistent results every time.
In this article, we’ll walk you through everything you need to know to make the perfect loaf of gluten-free bread, from the essential ingredients to step-by-step instructions and helpful tips. Let’s get started!
Table of contents
Ingredients for the Gluten Free Bread Machine Recipe
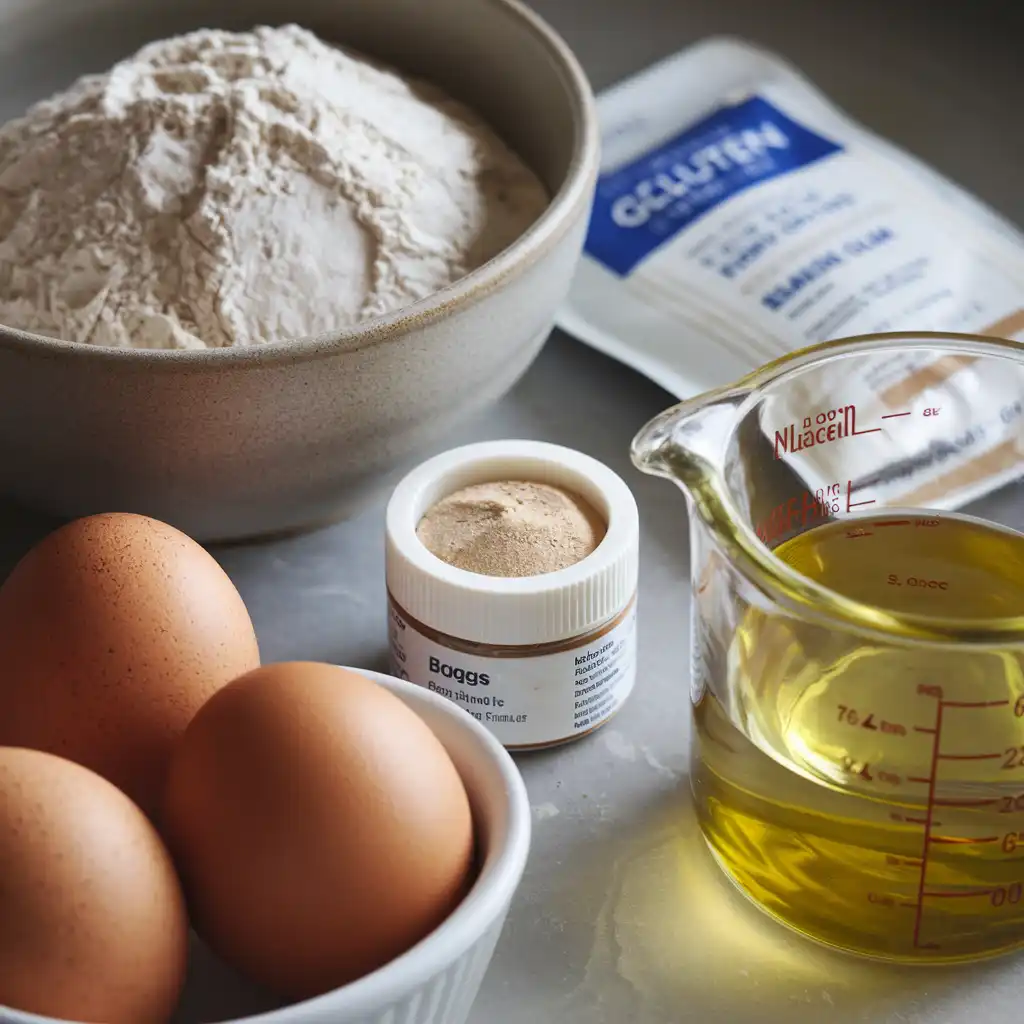
To make this recipe, you’ll need the following ingredients. Each plays a crucial role in achieving the perfect texture and flavor:
- 2 cups gluten-free all-purpose flour blend (look for one that includes xanthan gum for better texture)
- 1 teaspoon xanthan gum (omit if your flour blend already contains it)
- 1 teaspoon salt (enhances flavor and controls yeast activity)
- 1 tablespoon sugar (feeds the yeast and adds a touch of sweetness)
- 1 packet (2 ¼ teaspoons) active dry yeast (essential for rising)
- 1 cup warm water (around 110°F, to activate the yeast)
- 2 large eggs (adds structure and moisture)
- 2 tablespoons olive oil or melted butter (keeps the bread tender)
- 1 teaspoon apple cider vinegar (helps with rise and texture)
Why These Ingredients Matter
The gluten-free flour blend is the foundation of this recipe, providing the structure that gluten would normally offer. Xanthan gum acts as a binder, mimicking the elasticity of gluten. Eggs and oil add moisture and richness, while apple cider vinegar enhances the bread’s rise and texture.
Step-by-Step Instructions
Follow these detailed steps to create a perfect loaf using your bread machine.
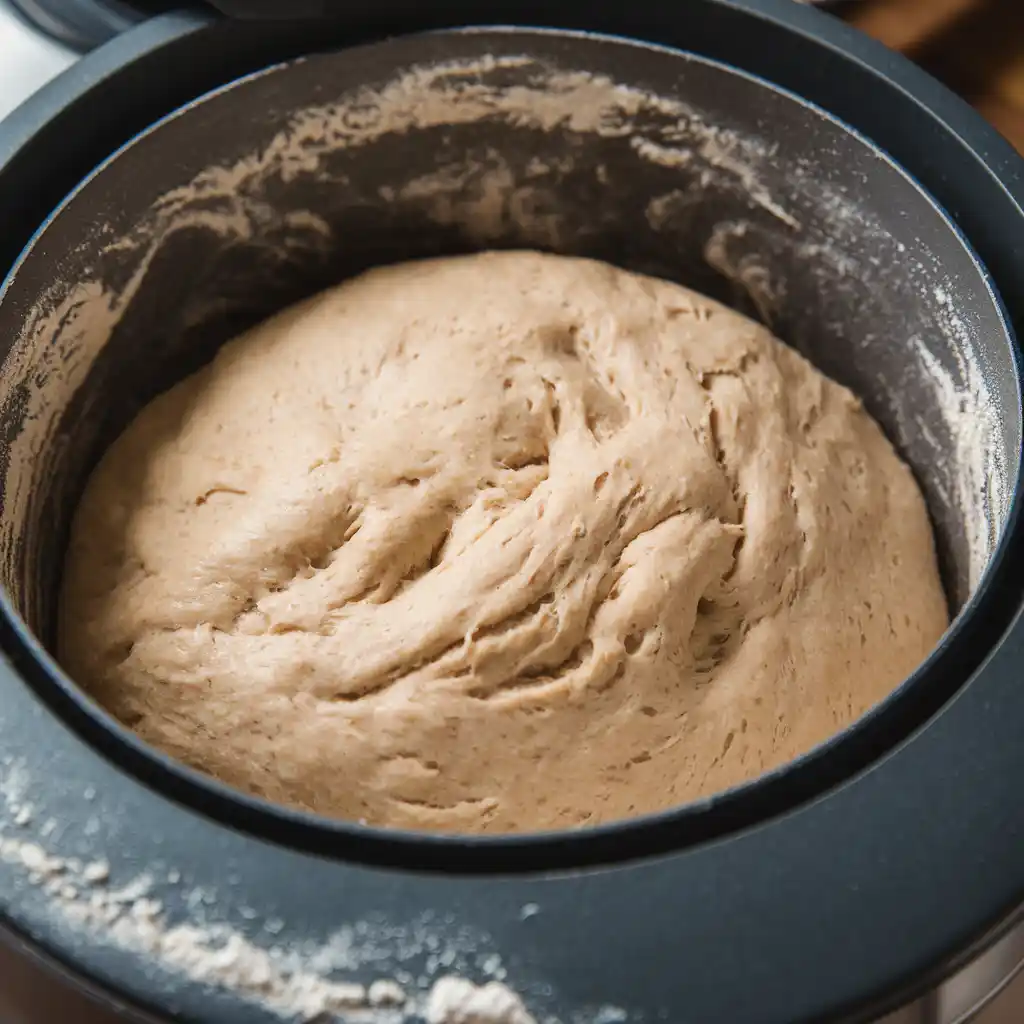
Step 1: Prepare Your Bread Machine
Begin by ensuring your bread machine is clean and ready to use. Insert the bread pan into the machine and attach the kneading paddle.
Step 2: Add Wet Ingredients
In a small bowl, whisk together the warm water, eggs, olive oil, and apple cider vinegar. Pour the wet mixture into the bread pan.
Step 3: Add Dry Ingredients
In a separate bowl, combine the gluten-free flour blend, xanthan gum (if needed), salt, and sugar. Mix well to ensure even distribution. Carefully add the dry ingredients to the bread pan, spreading them evenly over the wet mixture.
Step 4: Add the Yeast
Make a small well in the center of the dry ingredients and add the yeast. This ensures it doesn’t activate too early.
« For advanced techniques, explore our posts on Carbonara Recipe and Miso Soup Recipe. »
Step 5: Select the Gluten-Free Setting
Place the bread pan into the machine and secure the lid. Select the gluten-free setting on your bread machine. If your machine doesn’t have this setting, use the basic or white bread setting. Choose the loaf size (usually medium) and crust color (light or medium works best for gluten-free bread).
Step 6: Let the Machine Work Its Magic
Press start and let the bread machine do its job. The process typically takes 2–3 hours, depending on your machine. Avoid opening the lid during the baking process, as this can affect the bread’s rise.
Step 7: Remove and Cool the Bread
Once the cycle is complete, carefully remove the bread pan using oven mitts. Gently shake the pan to release the loaf and transfer it to a wire rack to cool completely before slicing.
Step 8: Slice and Enjoy
Use a serrated knife to slice the bread for even cuts. Serve warm with your favorite toppings or store for later use.
« Find out how to troubleshoot common cooking issues with Chili Soup Recipe and Ham Hock Recipe. »
Additional Tips for Perfecting Your Gluten-Free Loaf
Ingredient Substitutions
- Flour Blend: If you don’t have a gluten-free all-purpose blend, you can make your own using a mix of rice flour, tapioca starch, and potato starch.
- Eggs: For an egg-free version, use flax eggs (1 tablespoon ground flaxseed mixed with 3 tablespoons water per egg).
- Sugar: Substitute honey or maple syrup for a natural sweetener.
Storage Recommendations
- Store your gluten-free bread in an airtight container at room temperature for up to 3 days. For longer storage, wrap it tightly and freeze for up to 3 months.
Customizing Your Bread
- Add seeds like chia, flax, or sunflower for extra texture and nutrition.
- Incorporate herbs or spices like rosemary or garlic powder for a savory twist.
« For more time-saving tips, check out Easy Crockpot Meals and Filipino Adobo Recipe. »
Troubleshooting Common Issues
Why Is My Bread Dense?
Dense bread can result from using too much flour or not enough liquid. Ensure you measure your ingredients accurately and consider adding an extra tablespoon of water if the dough looks dry during the kneading process.
Why Didn’t My Bread Rise?
If your bread didn’t rise, the yeast may be expired or the water temperature may have been too hot or too cold. Always use fresh yeast and ensure the water is around 110°F.
How Can I Prevent a Gummy Texture?
A gummy texture often occurs when the bread isn’t baked long enough. Make sure to use the gluten-free setting on your machine, as it typically has a longer baking cycle to ensure the bread is fully cooked.
« Learn how to elevate your desserts with our expert advice on Cream Cheese Frosting Recipe and German Chocolate Cake Recipe. »
Variations of This Gluten-Free Bread Recipe
Seeded Gluten-Free Bread
Add 2 tablespoons of mixed seeds (such as chia, flax, or sunflower) to the dry ingredients for a nutty, textured loaf.
Herb and Garlic Gluten-Free Bread
Mix in 1 teaspoon of dried herbs (like rosemary or thyme) and 1 teaspoon of garlic powder for a savory twist.
Sweet Cinnamon Raisin Bread
Add 1 teaspoon of cinnamon to the dry ingredients and ½ cup of raisins during the kneading cycle for a sweet treat.
« For more creative ideas, explore our guides on Trendy Burgers Recipes and Philly Cheesesteak Recipe. »
Why Use a Bread Machine for Gluten-Free Baking?
Using a bread machine for gluten-free baking offers several advantages:
- Consistency: The machine ensures even mixing, kneading, and baking, reducing the risk of human error.
- Convenience: Simply add the ingredients, select the setting, and let the machine do the work.
- Perfect Texture: Bread machines are designed to handle gluten-free dough, which can be trickier to work with than traditional dough.
Frequently Asked Questions
Does Gluten-Free Bread Work in a Bread Maker?
Yes! Gluten-free bread can be successfully made in a bread maker, but it requires a different approach than traditional bread. Many modern bread machines have a specific gluten-free setting that adjusts the mixing, rising, and baking times to suit gluten-free dough, which tends to be stickier and denser than wheat-based dough.
What Is the Trick to Making Good Gluten-Free Bread?
The key to making great gluten-free bread is moisture, the right flour blend, and proper mixing. Here are a few tips:
- Use a high-quality gluten-free flour mix with a blend of rice flour, tapioca flour, and starches for better texture.
- Increase hydration since gluten-free flours absorb more liquid than wheat flour.
- Use xanthan gum or psyllium husk to improve elasticity and structure.
- Let the dough rise properly in a warm environment but avoid over-proofing.
- Avoid overmixing, as gluten-free dough doesn’t require kneading like traditional bread.
Learn how to source and store [ingredient] with our tips on Bolognese Recipe and Dumpling Recipe. »
Why Is My Gluten-Free Bread So Dense in a Bread Machine?
Gluten-free bread can turn out dense for several reasons:
- Too much flour: Measuring flour incorrectly or using a dense flour blend can result in a heavy loaf.
- Not enough leavening: Ensure you’re using fresh yeast or baking powder. Some gluten-free recipes benefit from a mix of yeast and baking powder.
- Incorrect liquid ratio: Gluten-free dough should be wetter than traditional dough. If it’s too dry, the bread won’t rise properly.
- Not enough mixing time: Unlike wheat dough, gluten-free dough needs thorough mixing to incorporate air and hydrate the flour properly.
Can I Use Bob’s Red Mill Gluten-Free Bread Mix in a Bread Machine?
Yes! Bob’s Red Mill Gluten-Free Bread Mix works well in a bread maker. Follow the package instructions, but also check your bread machine’s manual for gluten-free baking settings. You may need to adjust the liquid amount slightly for the best texture. Using the gluten-free cycle on your bread machine ensures proper mixing and baking times for the best results.
« For more ways to use [ingredient], check out our recipes for Cottage Cheese Recipes and Falafel Recipe. »
This recipe is a testament to how easy and enjoyable gluten-free baking can be. With the right ingredients, tools, and techniques, you can create a loaf that rivals any store-bought version. Don’t be afraid to experiment with flavors and textures to make this recipe your own.
We hope you found this guide helpful and inspiring. If you have any questions or want to share your baking success, leave a comment below or connect with us on social media. Happy baking!